To successfully read VW MQB NEC35xx chip, not only we do need to activate Xhorse VW MQB License, but also need to learn how to lift pin or cut wire on dashboard. Both the connection methods are workable for VVDI Key Tool Plus & VVDI2 + VVDI PROG. This is what we’re taking about.
Next we’ll demonstrate how to lift pin and cut wire on a MQB NEC3525 dashboard.
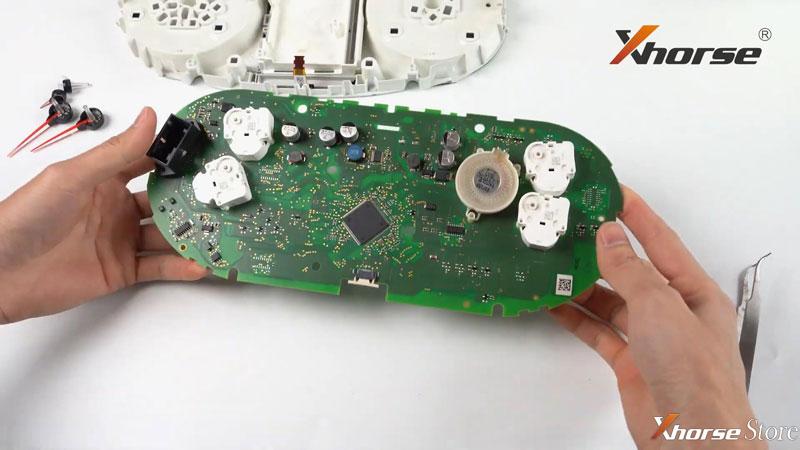
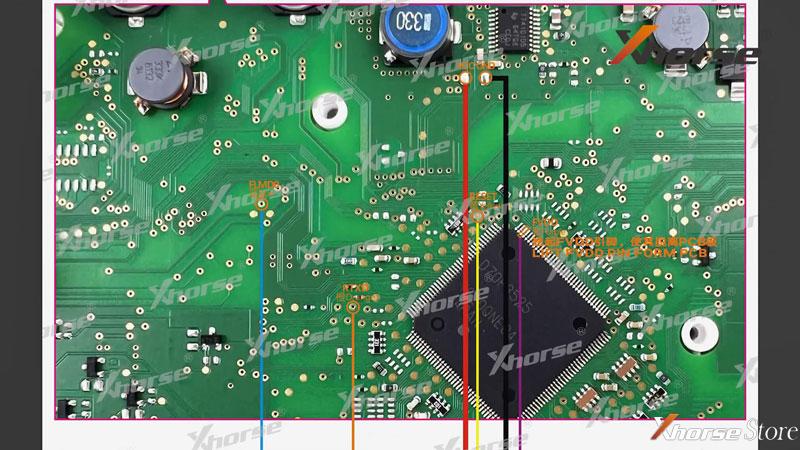
- Remove the needles to take out the PCB board.
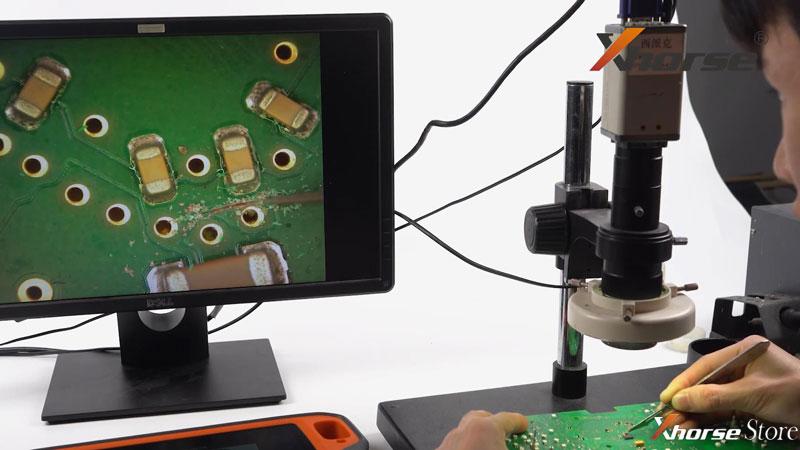
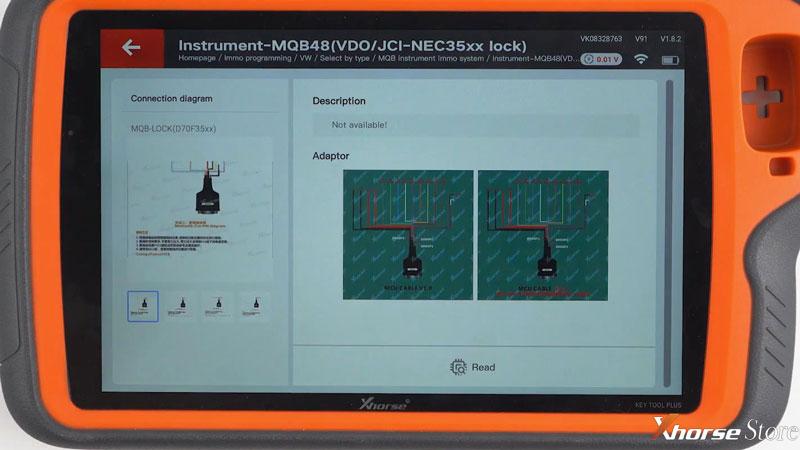
- Find out connection diagram on Key Tool Plus: Immo programming >> VW >> Select by type >> MQB instrument immo system >> Instrument MQB48(VDO/JCI-NEC35xx locked) >> Programmer reads files >> Read NEC35xx chip

Method 1: Lift Pin
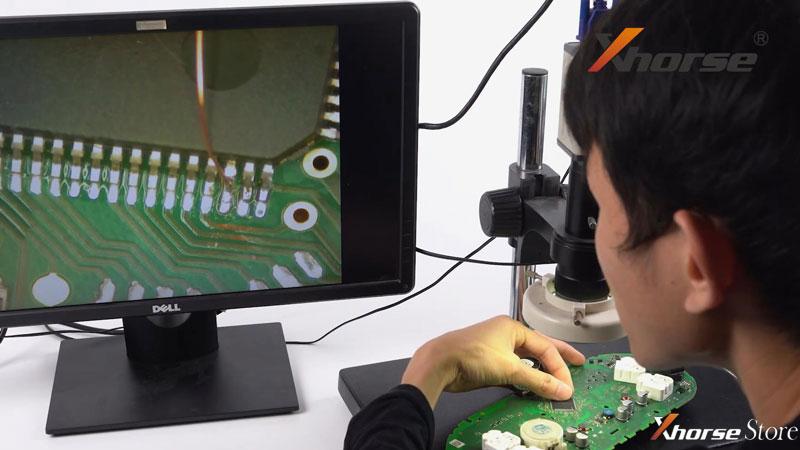
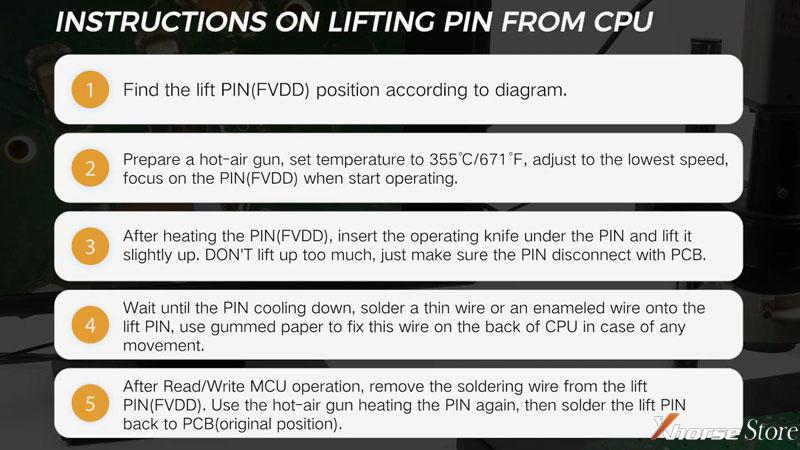
- Apply some scaling powder onto the pin we’ll lift later.
- Prepare a hot-air gun, turn the temperature to 355℃/671℉ and adjust to the lowest speed. Direct the gun to the FVDD, insert the operating knife under the PIN and lift it slightly up when the pin is heated properly.
(Note: Don’t lift up too much, just make sure the PIN disconnect with PCB. Otherwise, it may lead to pin breaking).
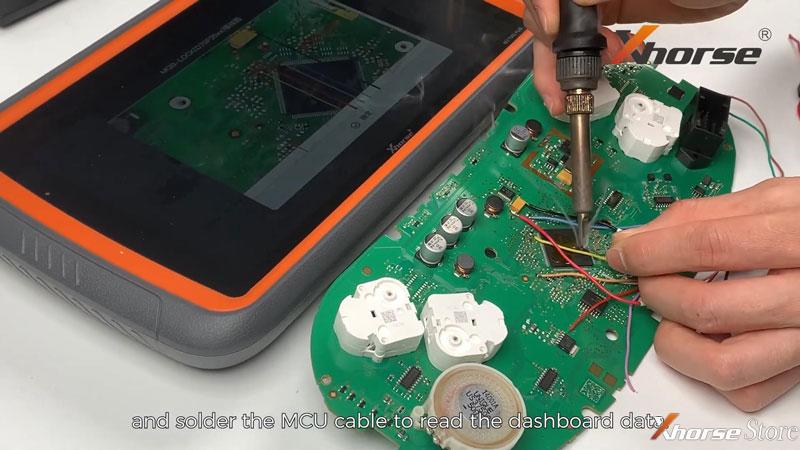
- When the pin disconnects from dashboard, solder a wire or an enamelled wire to the pin so that we can connect MCU cable later. Hold the wire in place with tape and do not move it.
Now we have finished the pin lifting.
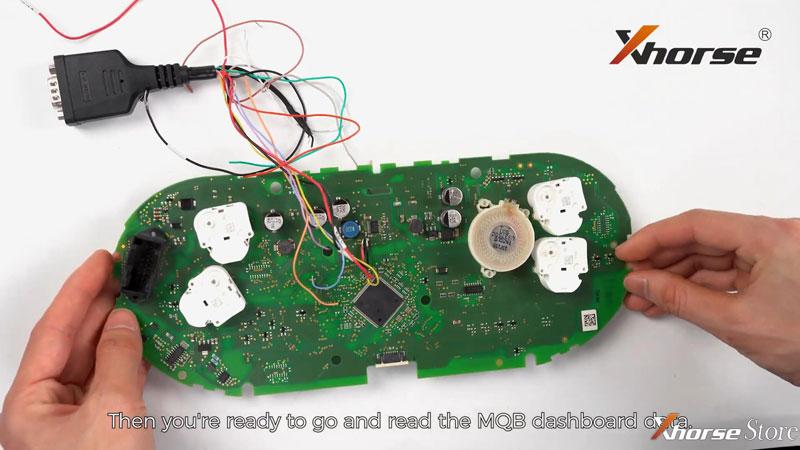
Follow the connecting diagram, solder the MCU cable to read MQB dashboard data. After getting the data out, restore the chip pin. Press the pin gently with tweezer. Use a a soldering iron to solder the pin back.
Method 2: Cut PCB Wire
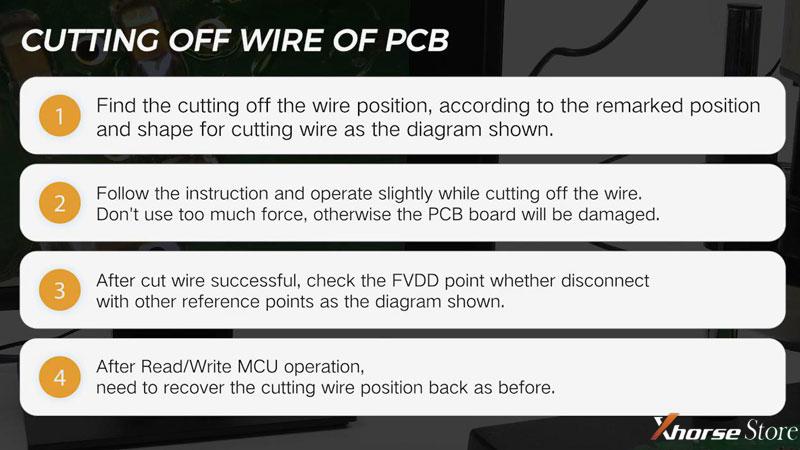
- Flip the PCB board, locate the position where to be cut wire.
- Follow the instructions to cut the wire till FVDD hole makes no conduction with the adjacent capacitor(Be careful not to bump into any capacitors nearby when cutting).
- After cutting, test whether the FVDD has disconnected from other points with a multimeter.
After that, solder the MCU cable onto the PCB board according to diagram. Then we’re ready to read the MQB dashboard data. After reading, restore the PCB board.